Tuesday, July 1, 2014

July Recipe a Week Challenge: Week 4

 
A celebration calls for a special dessert. And when I realised we were having the lunch for my grandpa I just knew that this Chocolate Truffle Tart would be ideal. I would also have a few people to help us eat it which is always a bonus.
 
I must admit that I was a little nervous for this week's July Recipe a Week Challenge. I am not a great baker. I do bake occassionally when required but I get bored with the precision of it. I don't do so well on exact measurements. And this tart was no exception. I estimated cups and grams.
 
I think I got lucky!
 
While MrB was man down with an ear infection, I took on my challenge.
It was really easy to make and definitely "reluctant hostess" friendly. I did have a panic attack when the tart was still wobbly after being in the fridge for an hour.
Luckily I could leave this until the next day and cross my fingers. The back up plan was ice cream with the wobbly mess swirled through it. This would teach me to follow a frikkin recipe
 
My stress was for nothing!
The next afternoon out came this lovely firm chocolate deliciousness. It was very richy but oh so tasty and a big hit with the guests.


Chocolate Truffle Tart
Serves 8 - 12 depending on your chocolate craving

Crust:
350g (2 packets - 1 for tasting) Oreo biscuits
50g butter, melted

Filling
375ml cream (I used Orley Whip - dairy free cream substitute as MrB is lactose intolerant)
300g dark chocolate (chopped) or 200g dark chocolate and 100g milk chocolate
5ml vanilla extract
2 eggs
 
Glaze:
100g dark chocolate
30ml cream
30ml honey
30ml boiling water

Pre-heat the oven to 180 degrees and grease one large tart dish (I did forget to grease it and it was ok).

To make the crust, crush the oreo biscuits in a food processor (I used my hand blender) until they are very fine (and try not to cry as the biscuits become crumbs).

Add the melted butter and blend until the crumbs resemble damp sand. I try to pat a a bit together and if it's firm and sticks then I think it's done. Otherwise I add more butter.
Press the crumbs into the dish to form the crust.

Place in the oven and bake for 10 minutes
Remove from the oven and allow to cool slightly.

To make the filling, bring the cream to a simmer in a saucepan. You're supposed to pour the cream over the chocolate but I wasn't keen on more dishes to I added the chocolate to the cream and removed it from the heat. Allow to sit for a few minutes and then stor until the chocolate is completely melted.
Add the vanilla extract and stir
Beat the eggs and add in. Mix well
Pour the filling into the tart case (Alida recommends pouring it through a sieve - it makes sense and luckily MrB helped). Place the tart in the oven and allow to bake for 7 - 10 minutes. The edges will be firm but the centre will still be wobbly - do not panic as this will set as it cool.

Remove from the oven and allow to cool

To make the glaze, heat the chocolate and cream together and stir until the chocolate is melted.
Add the honey and the boiling water and stir until combined.

Pour the glaze over the tarts ensuring it is evenly coated
Place the tart in the fridge for an hour or more before serving (I left it overnight).
Serve with fresh berries


July Recipe a Week Challenge: Week 3

Lasagne Cups - too delicious!
 
This challenge seems to be flying past. I can't believe we're half way through the July Recipe a Week Challenge. I was excited for the Lsagne Cups challenge. I think I picked this recipe and then created the entire week around it!
I was very tempted by the Fried Gnocchi dish as it sounded so good. When I read the recipe I realised how easy it would be. MrB decided it wasn't enough of a challenge and demanded the Lasagne Cups. I must admit, he was right, this was the best choice and so yummy!

If you want the original recipe with beef lasagne, please go to Alida's Simply Delicious page and view it here Alternatively, scroll down for our Chicken Lasagne Cups.


Chicken Lasagne Cups
This recipe makes 6 cups using ramekins. You can use muffin tins too.

Pasta
12 lasagna sheets, cooked until just softened
Mince Filling
400g Chicken Mince (if you can't find chicken mince, buy chicken sausage and squeeze the filling out of the casing)
1 onion, chopped fine
1 red pepper , chopped fine
1 clove of garlic, chopped fine
400ml tomato pasta sauce (I used the tomato and chilli one. You can make your own sauce but I ust had no time)
1tsp mixed dried herbs
salt and pepper to taste
White Sauce
1 cup creme fraiche
(The recipe calls for 1/2 cup mascarpone but I left this out)
juice of half a lemon
1/2 cup grated cheese (the recipe calls for pecorino but I used cheddar cheese)
salt and pepper to taste
Grated Mozarella for topping

Pre-heat the oven to 180. Grease and line (with baking paper) either a 6 giant muffin tray or 6 white ramekins (I bought mine at MrPrice Home for cheap!)
While chopping my veggies, I had a pot on the boil to cook the lasagna sheets.

Fry the chopped onion and peppers along with the garlic in a little bit of oil. Add the chicken mince and fry for a few minutes. Add the tomato sauce, mixed herbs and seasoning and allow to cook for about 10 minutes.

Make the white sauce by combining the creme fraiche, lemon juice and cheese. Mix well.

Once everything is cooked and ready to go, begin assembling your lasagne.
Press two lasagne sheets into the prepared muffin tray or ramekin. I actually placed the sheets on top of each other in a cross shape and then pressed them in.
I spooned a little bit of white sauce in and then topped with a few spoonfuls of the chicken mince, followed by a bit of the white sauce on top.
Top with the grated mozzarella and place in the pre-heated oven.
BAke for 15 - 20 minutes until the cheese is golden and bubbling. The exposed pasta will go crispy but this is delicious. MrB wants to make pasta "chips" based on how good this was.

Serve with salad.

Peanut Butter & Chocolate Cake - World Baking Day Challenge

 
In May I pledged to #Bakebrave and join World Baking Day 2013.
The idea is to bake out of your comfort zone. On the website they listed different baking challenges from 1 to 100. Challenge Level 1 was Banana Muffins and Challenge 100 was a Cake Boss style creation. I was pretty confident I could hit the 60 mark.
MrB was excited when he found out I would be baking an awesome cake. To reward his enthusiasm I let him decided which cake he wants me to bake. MrB definitely took me out of my comfort zone by picking number 78.
This 6 layer creation with various levels of icings and sauce and decoration was a lot bigger than I thought I was ready for.
In the end I did it. I baked and baked and mixed and created. We invited a few friends over to help us finish this gigantic cake! Despite the friends best efforts there was enough cake left over for me to take to the office the next day and for MrB to take two slices to work.
This was delicious and I would bake this again but on a smaller scale. The cake is just a bit rich in it's 6 layer decadence. The salty popcorn was the best though!
I am not sharing the entire recipe as it will take me all day to type. Have a look at the recipe here
 Enjoy the pictures from the day -
Fluffly batter on the go

Batter in the tin, ready to be baked

Success - two of the three cakes baked to golden brown

Cut the layers and ice away

Layers iced

Gooey delicious chocolate toffee sauce

Arranging the popcorn on top

Challenge complete


July Recipe a Week Challenge: Week 2

 
Week 2 of the July Recipe a Week Challenge and it kicked into high gear quickly. It's been such a crazy week that all I want to do is get take out or climb straight to bed and skip dinner. In my head this recipe felt like work. It's actually really easy, I am just tired and therefore lazy.
 
The picture of the fish had me drooling - I was so excited to tuck into this dish. The most challenging part was deciding what to make with is! Have a look at the original recipe here

 
 Pan-friend Fish with Lemon Cream Sauce
 (adapted to serve 2 people, but visit the original for a recipe for 4 people)
 
125ml cream
juice and zest of 1 lemon
1 garlic clove, minced
salt & pepper to taste
2 fish fillets (I sued one large fillet of hake and portioned into two)
1/2 cup flour
1/2 tsp salt
1 tsp seasoning spice (I used a Cajun spice)
oil for frying
 
Start off by making the sauce by combining all the ingredients in a saucepan and allow to simmer for 10 minutes. Allow to reduce slightly (it will thicken as you go) and stir well to combine all the ingredients.
 
While the sauce is on the go, combine the flour, salt, pepper and seasoning on a baking tray. Coat the fish fillets with the seasoned flour.
 
Heat the oil in a hot pan. Once hot, fry the fish starting with the skin side down first until gold brown. Fish cooks quickly so you should flip the fillet over after about 3 minutes depending on thickness. Fry for another 4-5 minutes until cooked through. Fish goes white and looses the translucent colour once cooked.
 
Serve hot. You can either pour over the sauce or serve on the side.
 
We served the fish with steamed baby carrots and new potatoes.
 
Enjoy!
 
Feel free to join in on the challenge at any time.


July Recipe a Week Challenge: Week 1

Indian Sticky Chicken
 
I kicked off my first week of the July Recipe a Week Challenge with Indian sticky Chicken. I am a big fan of Gordon's Ramsay's Sticky Lemon Chicken and I have secretly been dreaming of this Indian influenced dish. I flagged it to MrB when it was first published via Simply Delicious' Facebook feed.
Being the sweet wife I decided to ask MrB which of three menu choices for this week he wanted me to cook. I did a little happy dance when he said "the sticky Indian one".

I loved the spices!
The recipe calls for skinless, boneless chicken thighs but they only had the skinless ones at the shop. I think it would make a big difference but as it was just dinner for the two of use, we could survive.
The shop near my work didn't stock Garam Masala and nor did the one near MrB's work. Not to panic I googled how to make your own. Then I did panic as I didn't have the ingredients. MrB didn't panic. He just stopped at the Indian restaurant down the road and asked for some Garam Masala spice. They gave us 200g (more than enough) and we were set. So plan ahead and make sure you get the spice.
 
You can view the original recipe here


Sticky Indian Chicken
 
(The original recipe is for 4 people, we adapted it for 2 people)
4 skinless chicken thighs
1 1/2 tablespoon Garam Masala
1 teaspoon smoked paprika
1/2 teaspoon salt
1 cup runny honey
juice of 1 lemon
Fresh coriander


On a baking tray (or even a plate), sprinkle the Garam Masala, paprika and salt. Rub the chicken in the spices until well covered. Get in there, use your fingers and make sure the spices are everywhere. This is the flavour base for your chicken so don't be shy!
 
Heat some oil in a non-stick pan (I used our awesome heavy based Le Creuset pan - it's actually the base of our tagine but I use it for so much more. I will get my buffet casserole dish soon!).
I let the oil get to a medium heat to add some good colour to my chicken pieces. Let the chicken brown on both sides and then turn the heat down slightly and allow to cook through. Turn frequently to avoid the chicken pieces burning or sticking.
 
Add the honey and the lemon juice and allow to caramelise (this means to go sticky and brown) for a minute.
 
Serve hot and garnish with fresh coriander (this adds a lovely crisp lightness to the dish)
 
We served our chicken with wholewheat coucous (to soak up the juicy caramelised sauce) and steamed carrots. If this was summer I would have switched the carrots for a crunchy salad

 
It's not too late to join in on the challenge!


Daring Cooks Challenge: Meatballs

  The June Daring Cooks’ challenge sure kept us rolling – meatballs, that is! Shelley from C Mom Cook and Ruth from The Crafts of Mommyhood challenged us to try meatballs from around the world and to create our own meatball meal celebrating a culture or cuisine of our own choice.
 
 
I decided to add a South African twist to my meatballs - Bobotie flavoured meatballs.
Bobotie is one of our traditional comfort foods. My mom used to make it for us when we were kids and it was laways one of my favourites. It's a combination of curry spice and fruity sweetness with ground beef. Traditionally bobotie has a savoury egg custard topping and is served with sambals and yellow rice.
 
Bobotie Meatballs
 
Ingredients
500g lean mince (ground beef)
1 slice of bread, crumbed
1 egg
10ml curry powder (mild, medium or hot depending on your preference)
5 ml tumeric
5ml worcestshire sauce
10ml white wine vinegar
15ml apricot jam
pinch of salt
Oil for frying
 
In a large bowl, mix together all the ingredients. Make sure that everything has been incorporated and that there are no clumps of bread or spices.


In a heavy based pan, heat a little oil. Shape your meat mixture into golf ball size balls. Place each one into the pan. Allow to brown on each side. Lower the heat and allow to cook through. Mine took about 15 minutes. I added a little water to avoid the meatballs burning.
 
We served ours with rice and some roast vegetables.


MRB - the bread winner......and baker

 
So my lovely husband has officially become the bread winner this year. His little increase in April means he earns a few cents more than me. It's not how much more, it's just more that is the joke between us. Being older, I have always earned more but now that he has a real qualification, he is the provider as he likes to call himself. It's all just a light-hearted joke, he doesn't mind if I was to be the main income in the relationship.
 
Back to the story.
 
MrB has discover a love for baking bread. This is his new thing!

 
This past weekend he decided to bake his mom baguettes as a Mother's Day gift. So while I was blogging and watching TV, MrB googled a recipe and baked away.
 
 
He mixed the ingredients together. Then patiently waited for the dough to rise.
 
Once the dough had risen enough, he used those guns to punch down the dough

 
After the dough had been punched down, he separated it into 4 parts and shaped the baguettes. The dough was then left to rise again. So time consuming this bread making business.

 
Finally the little lovelies were popped into the oven. MrB sat down to watch some TV but jumped up every few minutes just to see how the breads were doing

 
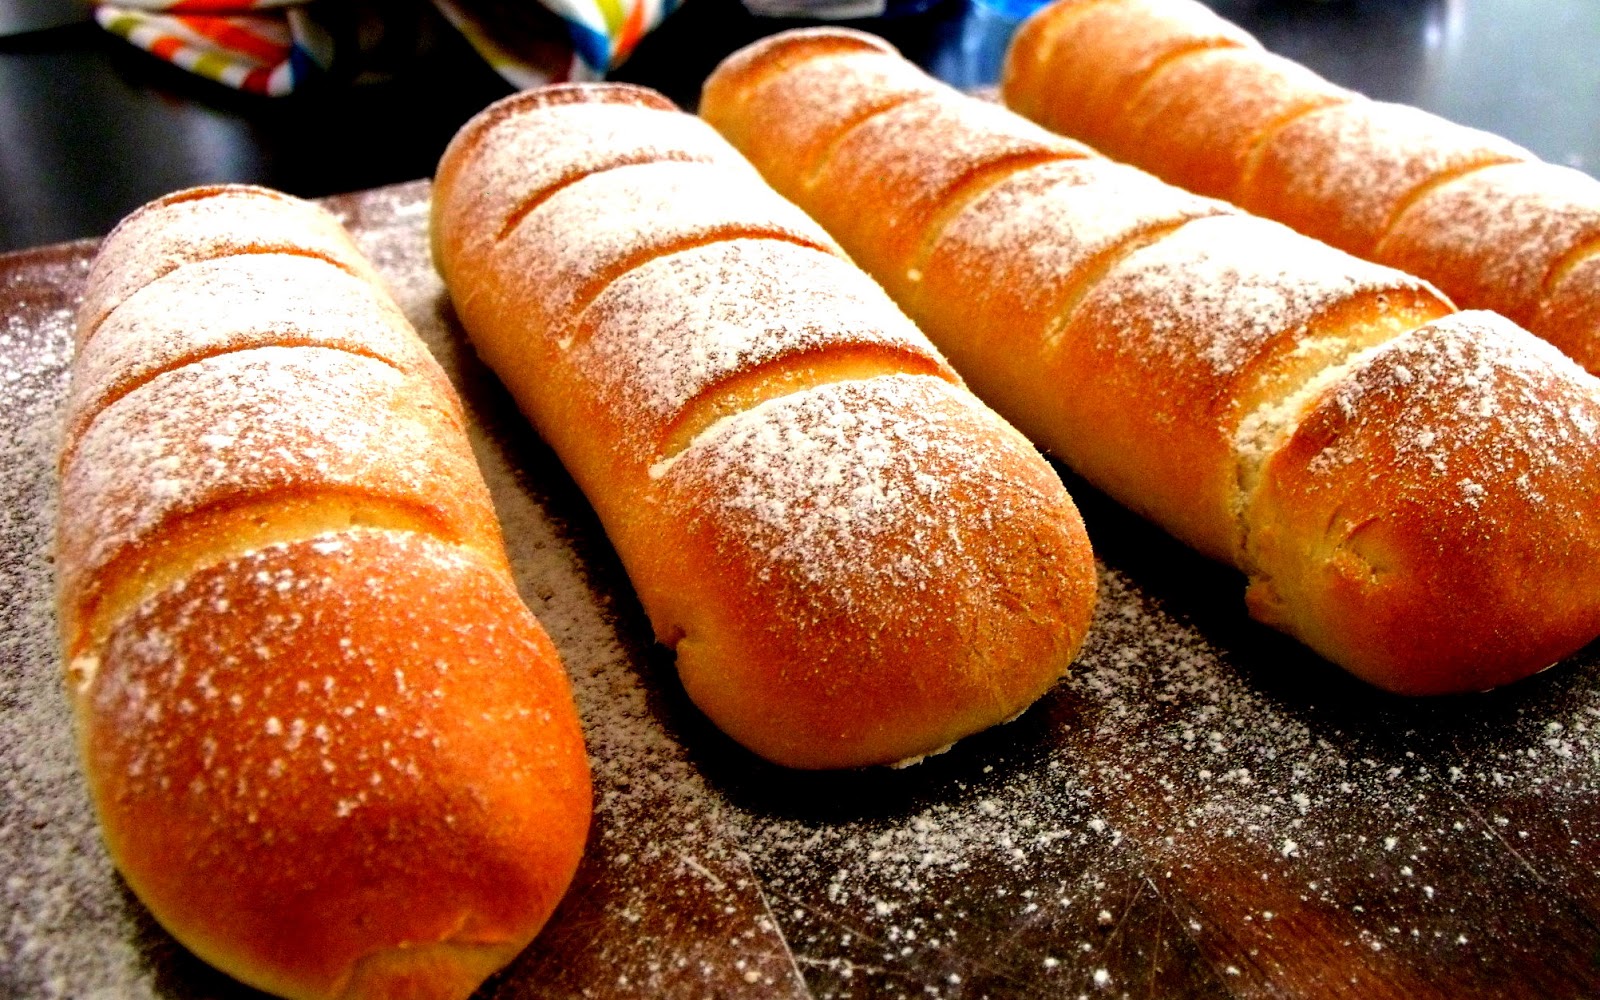
The final result. Four gorgeous loaves.
 
I love how the house is filled with the delicious aroma of fresly baked bread. It's decadent and comforting and makes me feel like a big blanket of warmth has been thrown over me. The bread was divine. So yummy! We ate thick slices with generous portions of butter that melted on contact.
 
mmmmmmmmmm, this husband of mine is welcome to keep baking. My waistline may not like it!